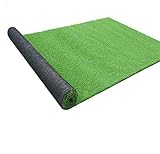
You can lay artificial turf on a wide variety of surfaces, including concrete, natural surface, or decking. While the simplest and most efficient way to do this would be hiring a professional contractor, the process involved isn’t that complicated and makes for a wonderful DIY project.
Learning how to install synthetic grass is a matter of following a few basic instructions and having fun while at it. Here are the steps you can follow to install artificial grass on your own property successfully.
Table of Contents
Step 1: Pre-Installation Preparations
This is the initial step and involves the preparation of the surface on which you will install the synthetic grass. This step can either be simple (pick up or sweep off any debris) or, advisably, thorough.
Being thorough involves the removal of any and all existing materials, be it soil, weeds, and anything above ground. You also have to cap sprinklers (do this at the pipe level) and mark the spots and backfill them to avoid any depressions on the surface.
This is also where you rough grade the area and uncover any underlying pipes, irrigation lines, and electrical wiring. If you locate any electrical wiring or sprinkler lines that must be moved, make sure to move them inwards (away from the perimeter or any hardscape by at least six inches). This will ensure that you don’t damage them when securing the turf’s edges with nails. Remember to lay all the moved wiring on top of your sub graded surface with u-nails.
Once all that is done, install bender boards to provide a clean line and much-needed separation between the ground and turf area.
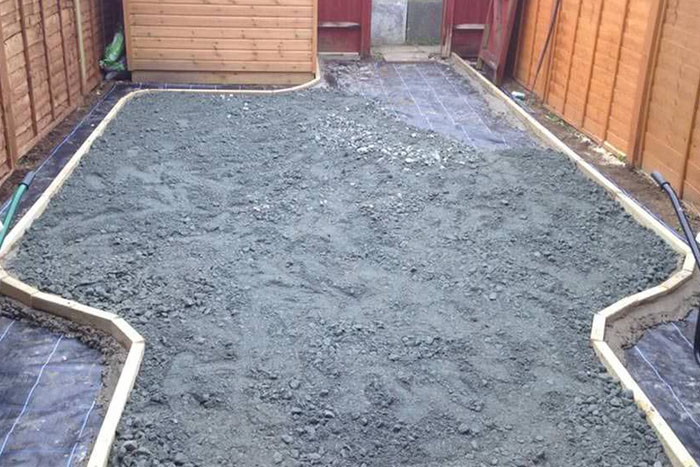
Step 2: Install the Base
The kind of base material you install will depend on what kind of use your turf is going to get. There is a special mixture of gravel and sand that allows for easy and efficient drainage. If your turf isn’t going to be used by pets or kids, then you want to the mixture of gravel to be 3 inches thick (less than that if this is going to be a play area).
You have to properly distribute and level this base material for two main reasons: efficient drainage and to give the finished turf a smooth and leveled appearance.
Step 3: Wet and Compact the Surface
The next step is to make that the base material you have laid down has a chance to settle properly. You can ensure this by properly wetting it. You also have to compact the surface. You can do this by vibrating, tamping and rolling the special gravel mixture. This will ensure that you have a solid base that can take the nails that you will use to install the turf.
Step 4: Custom Fit the Synthetic Turf
There are several steps that go into this single step:
- Trim the turf to fit the selected area: Once you have selected what kind of artificial grass you want on your property, you have to trim it to fit the selected area.
When doing so, do not trim it to a precise fit. You want to give it some room (about an inch more along the edges). This gives you something to work with when the time comes to tuck in those edges. You are encouraged to cut it using a seaming tool.
- Cut the turf in an S-shape: Cutting the turf in an S-shape as opposed to in straight lines will allow you to attach the pieces and avoid pushing them together at the angles. Cutting the pieces in a straight line tends to give the illusion of discoloration along those lines; the S-shape doesn’t.
- Join the edges using nails: When nailing down the edges, use nails at a distance of 6″ apart. Don’t drive the nails all the way down as this will create dimples in the turf. Drive them only 3/4 of the way in and separate the artificial grass blades to hide the nails.
- Use u-nails to secure the seams: The u-nails are also to be driven 3/4 of the way in for the same reasons.
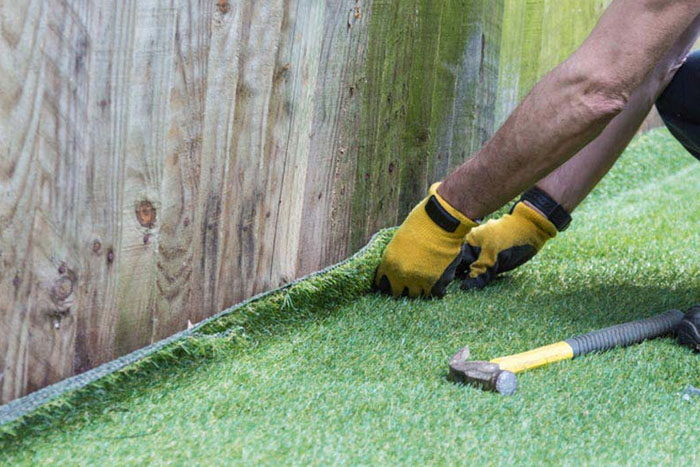
Step 5: Use a “Wonder Bar” to Turk in the Edges
You can give your synthetic turf a clean, well-manicured look by tucking in the edges against any hardscape using a “wonder bar” (an L-shaped pry bar that looks like a crowbar).
Step 6: Apply Filler Using a Power Brush
Use a power brush to apply the chosen infill. The type of infill you use will depend on the type of synthetic grass you bought. However, this infill is made out of the sand and an anti-bacterial substance that is not harmful to kids or pets. This infill material is meant to give the turf a lush and complete look as well as keep the grass blades upright over time.
It also plays a very important role in weighing down the turf against the base, so it doesn’t crumble like most rugs would when it experiences heavy human traffic. The power brush is used to pull against the turf’s grain to expose the spaces between the blades so you can evenly place the filler.


Step 7: Groom the Installed Synthetic Turf
When all is said and done, the final step involves gently brushing the installed turf surface. This is to ensure that the infill used settles well into the turf as well as to give it a nice, well-manicured look. This is also your chance to get rid of any debris that might have been left behind by the installation process.
The best thing about doing all this is that it only takes a few hours of your time. Yes, there is a bit of a learning curve but once the research phase is complete and you are confident that you have the necessary material, knowing how to install synthetic grass isn’t something that will only give you a project for the weekend, but it’s also a skill that can be monetized.
Once your neighbors see how good your lawn looks, you can start charging them to have the same thing done to their lawns. Win-win.